Where is it?
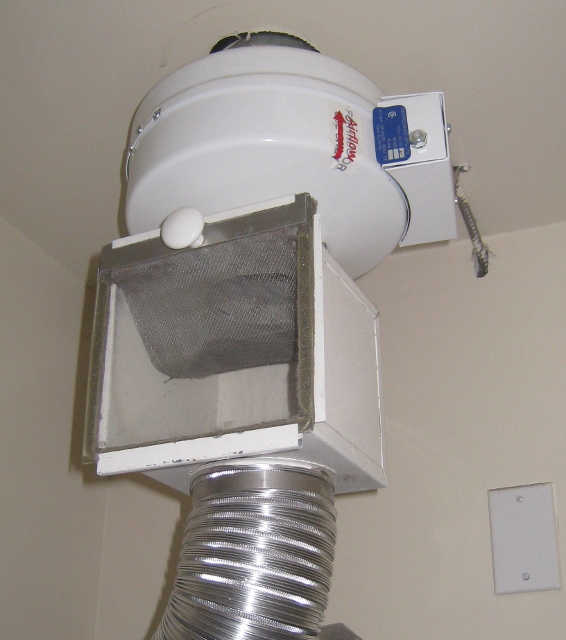
This booster fan is mounted just above your washer/dryer.
This photo shows the round Booster Fan at the top with a Lint Trap below. In some units the booster fan has been mounted above the ceiling drywall.
What is it for?
This booster fan is critical to the proper functioning of the dryer. It assists the internal dryer fan in pushing the moist air from the dryer through the ducts to the outside. It is required as dryer ducts in hi-rise residential buildings are much longer than in single family homes where the internal dryer fan is more than adequate.
How does it work?
The booster fan is turned on automatically by a “Current Sensing Switch” mounted behind a panel in the wall behind the washer/dryer. It works by sensing the current draw from the washer/dryer and if it goes above 1 Amp the switch turns on the booster fan. While the booster fan is only needed during dryer use the washer agitating a load also draws over 1A and thus also turns on the fan.
What can happen if this fan is not working?
This fan not running during dryer use will result in longer dry times, increased electrical consumption, and the condensation of water in the booster fan housing or the dryer ducts.
Water condensing in the duct can accumulate and then leak out at various locations including right above the dryer or anywhere along the dryer duct. This can lead to ceiling damage or staining. If your ceiling is damaged above your dryer the booster fan not running may be the issue.
Water condensing inside the booster fan can drip onto the top of the dryer and can lead to damage to the electrical devices mounted on the control panel of the washer/dryer. This has, on one occasion, led to a washer overfilling with water and causing a flood.
How to test if the booster Fan is functioning:
If you are at all uncomfortable about following these instructions please consult a professional.
1) Remove the cover to the lint trap just below the Booster Fan.
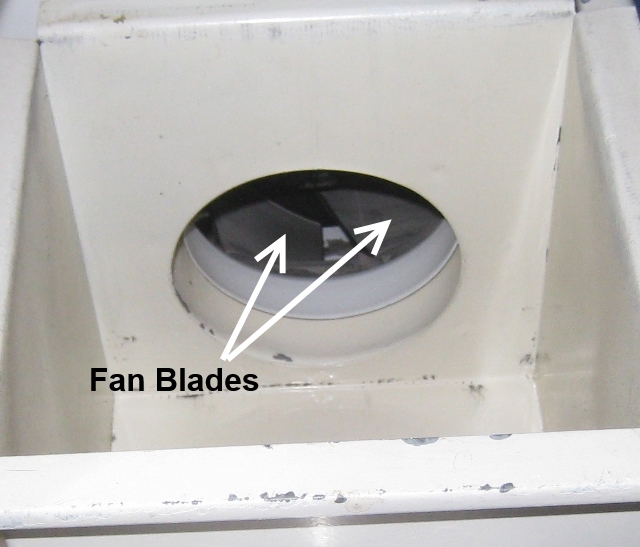
2) Look up through the lint trap and into the booster fan as in this photo.
3) You should be able to see the black blades of the fan.
4) Now turn on the dryer. As you do the fan blades should start spinning.
5) Another method is to listen for the booster fan. If it’s operational you should be able to hear it start. For this though you’ll need to start the washer agitating as running the dryer may drown out the booster fan.
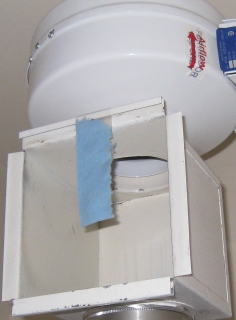
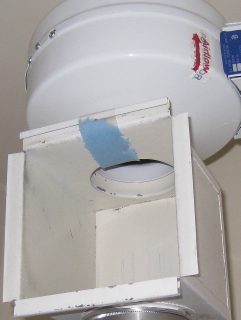
6) As a last resort you could try this. For this test you’ll also need to get the washer agitating to turn on the booster fan. Then firmly grasp a half sheet of toilet paper between two fingers allowing it to dangle down. Then slowly move the toilet paper towards the lint trap. If the Booster Fan is running it should draw the toilet paper into the lint trap as in the photos below. I used some blue paper towel taped to the lint trap to allow for better photos.
Do not reach into the booster fan.
Why does my Booster Fan not Run?
CAUTION: If you’ve determined that your booster fan is not working it’s time to call a Certified Electrician to do some trouble shooting. The information below has been provided to assist your electrician. Do not attempt repairs yourself!
Two issues can cause the booster fan to fail. The Current Sensing Switch and the Fan Electric Motor.
Current Sensing Switch
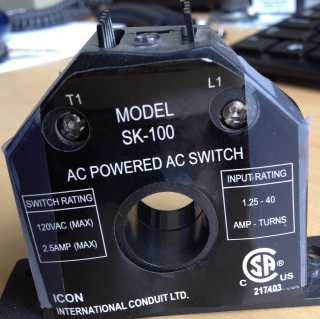
This switch detects if the washer or dryer are on by sensing the current draw of the washer/dryer. If the current draw goes above 1 Amp the switch closes and allows current to flow to the booster fan.
This switch can fail by getting stuck in either the ON or OFF position. If it fails in the ON position the booster fan runs all the time and if it fails in the OFF position the fan will not come at all.
Current Sensing Switches can be purchased at Pacific Controls, Regal Controls and likely at other places. At the time of writing (Oct 2017) they cost about $65.
The newest style switches have a timer feature that causes the booster fan to run for an additional 15 minutes after the dryer turns off. This helps in drying out the duct to prevent condensation damage. I would suggest searching out one of these.
Here’s what the Current Sensing Switches installed by the developer look like.
Electric Motor/Blower Assembly
The second part that can fail is the electric motor itself. The motor bearings generally start to make some squealing noise before they jam completely.
Test this by turning off the breaker at the electric panel and then reach into the lint trap and try to turn the fan. If it does not turn easily the bearings are seized up.
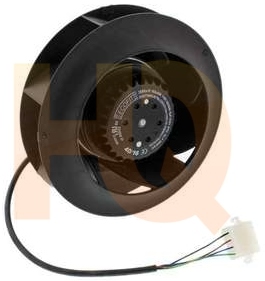
Replacement fan assemblies can be purchased at the link below. At the time of writing (September 2019) the company was in Richmond B.C. and the assembly cost about $151 with shipping to Brava of $11.
Reversomatic Exhaust Fan Motor & Blower Wheel Assembly TLD200
Amre Supply


